
When you first start mountaineering and camping, there is a lot to learn, and the focus is often on things like choosing equipment or food supplies. While all of these are important, other factors—such as having a suitable place to sleep or rest—also play a major role, and these can be achieved by knowing how to properly set up a mountaineering tent. Below, we have introduced some tips for pitching and setting up a tent while camping, as well as mistakes you might make along the way, so that you can enjoy a comfortable multi-day trip in nature.
Different types of mountaineering tents
Tents come in a variety of shapes and sizes, and each type has a slightly different setup process. The different types of mountaineering tents include the following:
- Ridge or A-frame tent: The classic A-frame tent, with its sturdy structure and easy setup, was one of the most popular tents for many years. This type of mountaineering tent usually relies on stakes and guylines for stability, and most modern models use aluminum poles.
- Tunnel tent: Tunnel tents feature a series of curved poles that create a tall, tunnel-shaped structure. They are spacious, versatile, and comfortable, although they may be heavy and not very resistant to strong winds.
- Pop-up tents: These simple mountaineering tents are designed to open without the need for stakes or guylines. Although pop-up tents are lightweight, easy to carry, and spacious enough for two people, they are usually more expensive and less stable than many other types of tents.
- Dome tent: Dome tents are among the most common types of tents for modern campers. In dome tents, two flexible poles cross at the top and bend down toward the ground. Mountaineering tents in a dome shape are usually affordable, lightweight, and easy to set up, although they may be unstable in strong winds.
.jpg)
- Geodesic and semi-geodesic tents: A geodesic or semi-geodesic tent is essentially a sturdier version of a dome tent. Designed with multiple intersecting poles and a more complex structure, these mountaineering tents may be challenging to pitch, but they are lightweight and stable even in harsh weather conditions.
- Inflatable tent: Inflatable tents, one of the newest designs on the market, require very little setup time. They have air-filled poles and are easy to pack and carry. They are ideal for family camping trips, but not the best choice for rough terrain.
- Cabin-style tent: If you want the whole family to fit into one tent, a cabin-style tent is a suitable option. These tents are very spacious and often include dividers to separate the main area from smaller rooms for privacy. However, cabin-style tents are heavy, can be complicated to set up, and are unstable in strong winds.
- Backpacking tents: Backpacking tents are designed to be as lightweight and compact as possible. Although they are not very spacious, they are simple and sturdy enough to withstand harsh conditions.
What points should we pay attention to when setting up a mountaineering tent?
✔ Not every open space is suitable for pitching a mountaineering tent, so you should find a place that is as level as possible. You may need to do a little clearing, which means removing any sticks or sharp rocks from under the tent site.
✔ Make sure you protect yourself from the elements. If you are camping in a windy and exposed area, it is best to find as much shelter as possible; this could be behind a rock or lower down from the summit to provide protection.
✔ Choose as flat a surface as possible. A slope of more than **50 millimeters** can affect your sleep. If you have no choice but to pitch your tent on a slope, place your head at the highest point.
✔ When setting up a mountaineering tent, make sure the fastenings are secure on all sides. Loose fabric is more likely to tear and creates noise in windy conditions. On the other hand, do not tighten it so much that the tent seams are overstretched. Start by adjusting the four corners of the tent properly—if you get this first step right, the rest of the setup becomes much easier.
✔ It is always wise to place a groundsheet or tarp underneath your mountaineering tent first, especially if it is already raining.
✔ A complete tent has many parts, including the footprint, stakes, poles, rainfly, and the tent itself. Be sure to pack them in a way that makes it easy to access the first items you need at the beginning and the last items you need at the end.
✔ To make your campsite as safe as possible, pitch your tent away from fire pits or barbecues. If you place your mountaineering tent too close, there is a risk of it catching fire from sparks or drifting embers.
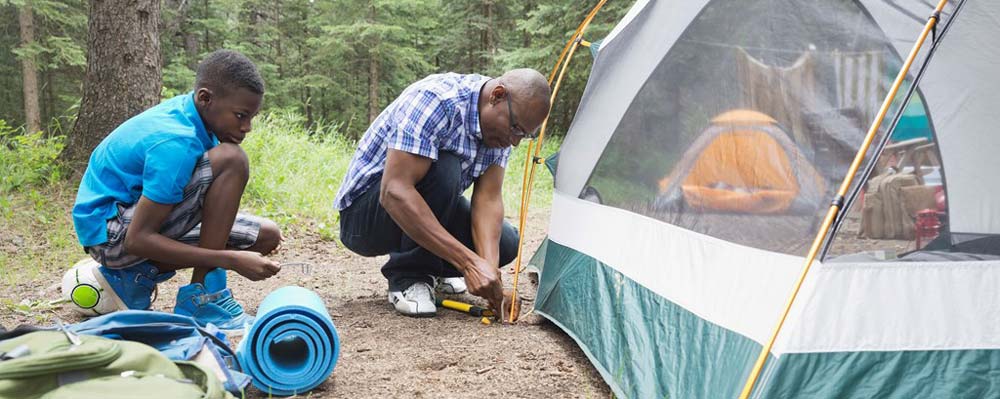
Common mistakes when setting up a mountaineering tent
Camping is generally a lot of fun and an opportunity to create unforgettable memories. But one of its less enjoyable parts is setting up your mountaineering tent. We have prepared a list of common mistakes that people are most likely to make when pitching their tent, so you can avoid them and set up your camp properly:1- You have not practiced setting up your mountaineering tent in advance.
If your tent is new and you have never used it before, it is best to test it before you even begin your trip and set it up at home or in the yard. The last thing you want during a mountaineering trip is to be figuring out how to pitch your tent in the rain, or to be left uncertain if you have forgotten the instructions. Not only that, but this also gives you a chance to check it for any holes or damage.
2- You did not check above the tent site.
It is really important to look up before you start camping and make sure there is no danger above your head. You should make sure not to pitch your mountaineering tent under a beehive or a half-broken tree branch, as these could damage not only your tent but also injure you.
3- Pitching your mountaineering tent at the bottom or top of a hill.
You should try to find flat ground and avoid pitching your tent at either the lowest point of a hill or right on the top of it. The ideal campsite is on relatively elevated ground, where you are not too close to streams or surface water, because if it rains, the water level may rise and soak your tent. If you camp on top of a hill, you will be completely exposed and without shelter, and during a thunderstorm you may become the highest point in the area and a potential target for lightning.
4- Not looking for shelter.
You cannot stop the wind while camping, but there are steps you can take to reduce its impact. Before setting up camp, you should determine the prevailing wind direction. Once you know that, try to pitch your mountaineering tent behind a hedge or a rock, so they can act as a natural windbreak and help protect your tent from damage.
5- Not checking the ground conditions before pitching your mountaineering tent.
There is nothing worse than finding a good campsite only to realize that the ground is too hard for your tent stakes to go in, or too wet for them to hold securely. Always check the ground conditions beforehand—not only for this reason, but also for tree roots and rocks that can make sitting or sleeping uncomfortable.
 Receiving information...